Blockchain has fundamentally transformed how we view data and security. At its core, blockchain is a distributed ledger that records transactions across multiple nodes, making it nearly impossible to alter these records once they are confirmed. This groundbreaking innovation has revolutionized the finance sector, giving rise to the cryptocurrency market.
But blockchain’s influence doesn’t stop there—it’s reshaping industries like healthcare, supply chain management, and beyond.
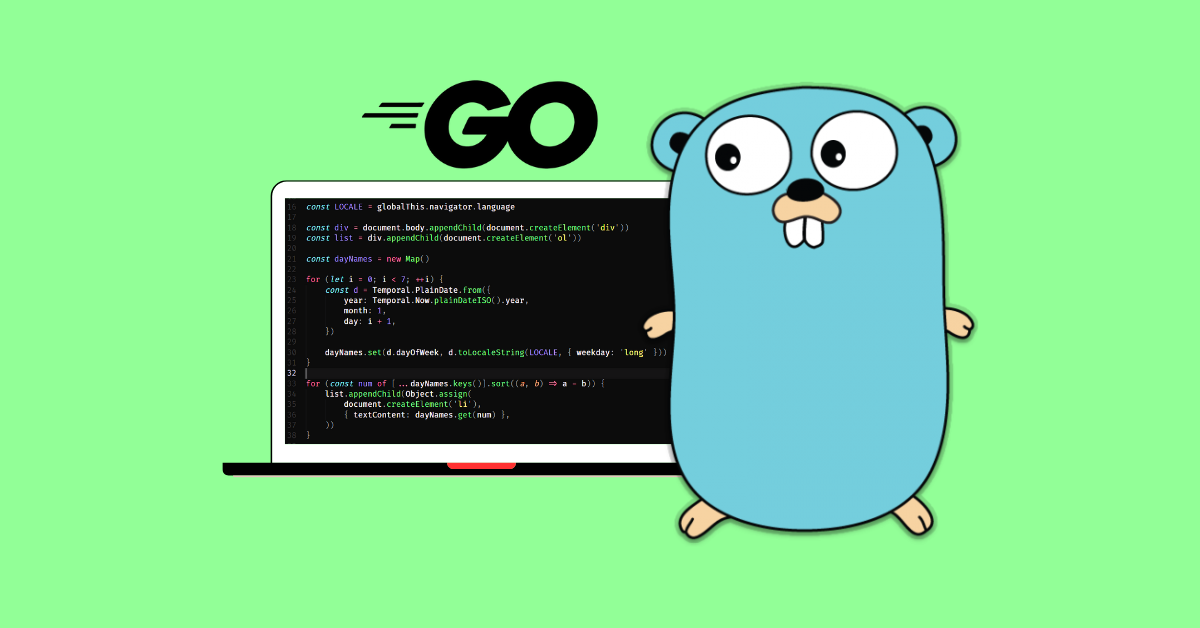
Go, also known as Golang, is a programming language developed by Google, celebrated for its efficiency and scalability in software development. As a statically typed, compiled language, Go translates code directly into machine language, resulting in faster execution—something blockchain networks critically need.
Blockchain systems demand speed and high throughput, which is where Go excels.
One of Go’s standout features is its ability to support concurrency. This means Go can handle multiple operations simultaneously, maximizing system utilization. In blockchain, where multiple blocks and transactions occur at once, Go’s concurrency model manages these tasks efficiently without complicating multi-thread management.
Go comes with a comprehensive standard library that provides essential packages for networking, cryptography, and data handling—key functionalities for any blockchain system. Additionally, Go’s simplicity and readability reduce the learning curve, making it easier for developers to grasp the language and its syntax quickly.
With a large, active community and growing industry support, resolving any issues that arise during blockchain development becomes easier. Go offers a robust foundation for developers looking to build scalable, high-performance blockchain solutions.
This article is tailored for beginners diving into the worlds of Go and blockchain. You’ll learn everything from setting up your environment to configuring prerequisites, and compiling, and testing your own blockchain applications. So, are you ready to explore blockchain with Go? Let’s get started!
Before we dive into the syntax and functions, it’s essential to grasp the core concepts of blockchain. Understanding these fundamentals will make it easier to follow the technical steps ahead.
Blockchain has three components: Blocks, transactions, and Chains.
Blocks: A block is a primitive unit of blockchain, it permanently stores the data of transactions. Each block has its own metadata– such as the index, timestamp, hash, and actual transaction information. These blocks are chained together, forming a sequential and immutable ledger.
Transaction: Transactions are the driving force of the system. They represent all the necessary information regarding the exchange of currency, transfer of information, etc on the network. Every block contains a series of transactions that are processed and verified by the blockchain network.
Chain: Each block has a pointer to the previous block that acts as a reference and this continuous link of blocks together is called a chain of blocks, Hence Blockchain.
Decentralization: Unlike traditional databases managed by a central authority, blockchain distributes control across multiple nodes. Each node maintains a copy of the blockchain, ensuring transparency and reducing the risk of centralized corruption or failure.
Immutability: Once data is recorded on the blockchain, it cannot be altered. This is achieved by linking each block to the previous one using a cryptographic hash. Any attempt to tamper with a block alters its hash, breaking the chain and alerting the network.
Consensus Mechanism: Consensus mechanisms are protocols that all participants use to validate transactions and the state of the ledger. Common mechanisms include Proof of Work (PoW), Proof of Stake (PoS), and Practical Byzantine Fault Tolerance (PBFT).
Ready to Build Blockchain with Go?
By now, you should have a solid grasp of blockchain fundamentals. Now comes the exciting part! In the following sections, we’ll guide you step-by-step through building your own blockchain applications using Go.
Get ready to get hands-on! Let’s dive into the practical side of blockchain development with Go.
Before you hop on to writing code and contracts, the right development environment is necessary. This involves a couple of steps. Below is a detailed guide to get started. Get set go!!
Windows: The Go installer adds Go to your system’s PATH automatically, but you can manually add it via the System Properties > Environment Variables if needed
MacOS/Linux: export PATH=$PATH:/usr/local/go/bin (in the bash or zshrc)
Verify installation using the command: go version
This will give you output for e.g: go version go1.19.0 linux/amd64
An Integrated Development Environment is the most necessary element for any kind of programming. In other words, it is another code editor. When you go to choose there are a bunch of options but the two most popular choices are VSCode and GoLand.
Visual Studio Code: VSCode – developed by Microsoft is an open-source platform, it is versatile and lightweight and is used for various programming languages. It offers powerful features like code completion, debugging, and version control.
GoLand: GoLand– developed by JetBrains, is an IDE tailored specifically for Go development. It includes powerful debugging, testing, and refactoring tools, as well as integrated database support, making it a robust choice for larger projects.
Here you are ready to create Go blockchain projects !!
Use go get to install essential libraries.
Blocks are the foundation units of Blockchain. Block contains all the transaction information, unique identifiers, and links to previous blocks. In this chapter, we will explore the structure of the block in Golang in more detail.
Block is represented in the form of a data type called struct, it can be a user-defined data type. Block struct contains attributes like:
In the following code snippet, we have implemented the block struct.
| type Block struct { Index int Timestamp string Data string PreviousHash string Hash string} |
Implement methods to calculate the hash of the block using Go syntax:
| import ( “crypto/sha256” “fmt” ) func (b *Block) calculateHash() string { data := fmt.Sprintf(“%d%s%s%s”, b.Index, b.Timestamp, b.Data, b.PreviousHash) hash := sha256.Sum256([]byte(data)) return fmt.Sprintf(“%x”, hash)} |
Function calculateHash() is used to compute the hashing of the current block
After you are done with defining the blockclass and its attributes you can further go and create the genesis block. The Genesis block is the first block in the blockchain that needs to be initialized and has an index of zero. After defining the genesis block you can further go on and add new blocks to your blockchain by using the addblock() method. After you add the new block calculate the hash of that block also. Here is the code:
| func createGenesisBlock() Block { return Block{Index: 0, Timestamp: “2024-09-16”, Data: “Genesis Block”, PreviousHash: “0”} } func createGenesisBlock() Block { return Block{Index: 0, Timestamp: “2024-09-16”, Data: “Genesis Block”, PreviousHash: “0”} } func (bc *Blockchain) addBlock(data string) { prevBlock := bc.getLatestBlock() newBlock := Block{ Index: prevBlock.Index + 1, Timestamp: “2024-09-16”, Data: data, PreviousHash: prevBlock.Hash, } newBlock.Hash = newBlock.calculateHash() bc.Blocks = append(bc.Blocks, newBlock) } |
We have earlier had an overview of consensus mechanisms in this article, now let’s explore more about them in this chapter. Consensus mechanisms are crucial to secure and validate transactions and the state of the database.
The most used Consensus Mechanism is Proof of Work. In PoW miners compete with each other in a time-bound situation to solve the difficult cryptographic puzzle. Hence, only when you find the most appropriate nonce and get it verified the new block will be added. This aggravated effort ensures that nobody can control or introduce the blocks without spending those computational efforts.
In the first step we need to add a proof attribute to the struct:
}type Block struct { Index int Timestamp string Transactions []Transaction Proof int PreviousHash string } |
In the second step Implement the proof of Work method to generate the proof that satisfies the difficulty level.
type Block struct { Index int Timestamp string Transactions []Transaction Proof int PreviousHash string } func (b *Block) proofOfWork(lastProof int) int { proof := 0 for !isValidProof(lastProof, proof) { proof++ } return proof } func isValidProof(lastProof, proof int) bool { guess := strconv.Itoa(lastProof) + strconv.Itoa(proof) guessHash := sha256.New() guessHash.Write([]byte(guess)) guessHashString := fmt.Sprintf(“%x”, guessHash.Sum(nil)) return guessHashString[:4] == “0000” } |
Update Blockchain struct to validate proof before adding new blocks. This step makes sure only valid blocks are added to the blockchain.
type Blockchain struct { Chain []Block CurrentTransactions []Transaction } func (bc *Blockchain) addBlock(proof int, previousHash string) { block := Block{ Index: len(bc.Chain) + 1, Timestamp: time.Now().String(), Transactions: bc.CurrentTransactions, Proof: proof, PreviousHash: previousHash, } bc.Chain = append(bc.Chain, block) bc.CurrentTransactions = nil } func (bc *Blockchain) validProof(lastProof, proof int) bool { guess := strconv.Itoa(lastProof) + strconv.Itoa(proof) guessHash := sha256.New() guessHash.Write([]byte(guess)) guessHashString := fmt.Sprintf(“%x”, guessHash.Sum(nil)) return guessHashString[:4] == “0000”} |
Application programming Interface also known as API is the heart and soul of any application. API helps different software/ platforms to interact with each other. This brings in the cohesive nature and seamless integration of networks and systems external to the blockchain. APIs differentiate the front end and the backend part and simplify the interaction even more. APIs facilitate easy integration of blockchain features into existing systems
Since Go is already installed and configured in your system you can go ahead and set up the API environment. Go has a standard library which is quite enough for the APIs but you can still go for Gin and Swagger to build and document your API.
Install and configure tools required for creating APIs with Go.
| go get -u github.com/gin-gonic/gin //Gin go get -u github.com/swaggo/swag/cmd/swag //Swagger for documentation |
Building APIs provides a modular approach, allowing for scalable and maintainable integration of blockchain features into various systems.
Create an API to define endpoints for adding blocks and viewing the blockchain using Go.
| //Setting up the server package main import ( “github.com/gin-gonic/gin” “net/http” ) func main() { r := gin.Default() r.POST(“/mine”, mineBlock) r.GET(“/chain”, getChain) r.Run(“:8080”) } //add a block handler func addBlockHandler(w http.ResponseWriter, r *http.Request) { var newBlock Block json.NewDecoder(r.Body).Decode(&newBlock) blockchain.addBlock(newBlock.Data) json.NewEncoder(w).Encode(newBlock) } func getBlockchainHandler(w http.ResponseWriter, r *http.Request) { json.NewEncoder(w).Encode(blockchain) } //Define API endpoints func mineBlock(c *gin.Context) { // Logic to mine a new block c.JSON(http.StatusOK, gin.H{“message”: “Block mined successfully”}) } func getChain(c *gin.Context) { // Logic to return the blockchain c.JSON(http.StatusOK, gin.H{“chain”: blockchain}) } |
In the above code snippet, API Block Handlers are functions that process requests related to blockchain operations, such as adding new blocks or retrieving block data. API Endpoints are specific URLs or routes in an API that correspond to different operations or resources.
The final step of any development process is Testing the application. This tells us a lot about the functionalities of the App that we have created. There are several methods of testing –Unit testing, Integrated testing, and Quality assurance testing. Testing the application before you deploy it and it is fully functional is important.
Compile and run the Go blockchain application.
| go run main.go |
This command compiles and executes your code. As a result, you will have requests incoming at the 8080 port as specified.
Test the API endpoints using Postman or curl.
| curl -X POST -d ‘{“Data”:”New Block”}’ http://localhost:8080/block |
Click Send to submit the request. You should receive a response indicating whether the block was successfully added.
Also Read: Building a Blockchain Application with C++
Triumph! You have reached the end of the development journey. Before we conclude let’s combine everything that we have studied so far and implement it in a single step-by-step code.
| package main import ( “crypto/sha256” “encoding/hex” “encoding/json” “fmt” “log” “net/http” “strconv” “strings” “time” “github.com/gorilla/mux”) // Block represents each ‘item’ in the blockchaintype Block struct { Index int // Position of the block in the chain Timestamp string // Timestamp of block creation Data string // Data being stored in the block PreviousHash string // Hash of the previous block Hash string // Hash of the current block Proof int // Proof of Work } // Blockchain represents the entire chain of blocks type Blockchain struct { Blocks []Block } // Create the genesis block (the first block in the chain) func createGenesisBlock() Block { return Block{ Index: 0, Timestamp: time.Now().String(), Data: “Genesis Block”, PreviousHash: “0”, Proof: 0, Hash: calculateHash(0, time.Now().String(), “Genesis Block”, “0”, 0), } } // Calculate hash of the block func calculateHash(index int, timestamp, data, previousHash string, proof int) string { record := strconv.Itoa(index) + timestamp + data + previousHash + strconv.Itoa(proof) hash := sha256.New() hash.Write([]byte(record)) hashed := hash.Sum(nil) return hex.EncodeToString(hashed) } // Proof of Work algorithm – a simple PoW implementation where we find a hash with a certain number of leading zerosfunc (b *Block) proofOfWork(difficulty int) { for { b.Hash = calculateHash(b.Index, b.Timestamp, b.Data, b.PreviousHash, b.Proof) if strings.HasPrefix(b.Hash, strings.Repeat(“0”, difficulty)) { break } b.Proof++ } } // Add a new block to the blockchain func (bc *Blockchain) addBlock(data string, difficulty int) { prevBlock := bc.getLatestBlock() newBlock := Block{ Index: prevBlock.Index + 1, Timestamp: time.Now().String(), Data: data, PreviousHash: prevBlock.Hash, Proof: 0, } newBlock.proofOfWork(difficulty) bc.Blocks = append(bc.Blocks, newBlock) } // Get the latest block in the chain func (bc *Blockchain) getLatestBlock() Block { return bc.Blocks[len(bc.Blocks)-1] } // Initialize the blockchain with the genesis block func initializeBlockchain() *Blockchain { genesisBlock := createGenesisBlock() return &Blockchain{[]Block{genesisBlock}}} // API Handlers // Get the entire blockchain func getBlockchainHandler(w http.ResponseWriter, r *http.Request) { json.NewEncoder(w).Encode(blockchain.Blocks)} // Add a new block to the blockchain func addBlockHandler(w http.ResponseWriter, r *http.Request) { var newBlockData struct { Data string `json:”data”` } _ = json.NewDecoder(r.Body).Decode(&newBlockData) blockchain.addBlock(newBlockData.Data, difficulty) json.NewEncoder(w).Encode(blockchain.getLatestBlock()) } // Initialize the blockchain and difficulty level for Proof of Work var blockchain = initializeBlockchain() var difficulty = 3 // Difficulty level of Proof of Work // Set up the API server func main() { router := mux.NewRouter() router.HandleFunc(“/blockchain”, getBlockchainHandler).Methods(“GET”) router.HandleFunc(“/block”, addBlockHandler).Methods(“POST”) log.Println(“Listening on port 8080…”) log.Fatal(http.ListenAndServe(“:8080”, router))} |
Congratulations! You’ve successfully built a functional blockchain application using Go! Through this guide, you’ve gained foundational skills, including creating a blockchain from scratch, implementing Proof of Work, and setting up a REST API to interact with your blockchain. The key takeaways from this journey include:
But this is just the beginning. As you continue your journey into blockchain development with Go, there are exciting areas to explore and improve.
The future of Go in decentralized application (dApp) development holds immense potential. Some advanced topics worth diving into include:
As you move forward, don’t hesitate to experiment, refine, and innovate. The world of blockchain is rapidly evolving, and your skills with Go will allow you to stay at the cutting edge.
Thank you for following this guide, and happy coding as you continue your blockchain development journey!
Also Check Out: How to Build Your First Blockchain with Plutus: A Step-by-Step Tutorial
CoinPedia has been delivering accurate and timely cryptocurrency and blockchain updates since 2017. All content is created by our expert panel of analysts and journalists, following strict Editorial Guidelines based on E-E-A-T (Experience, Expertise, Authoritativeness, Trustworthiness). Every article is fact-checked against reputable sources to ensure accuracy, transparency, and reliability. Our review policy guarantees unbiased evaluations when recommending exchanges, platforms, or tools. We strive to provide timely updates about everything crypto & blockchain, right from startups to industry majors.
All opinions and insights shared represent the author's own views on current market conditions. Please do your own research before making investment decisions. Neither the writer nor the publication assumes responsibility for your financial choices.
Sponsored content and affiliate links may appear on our site. Advertisements are marked clearly, and our editorial content remains entirely independent from our ad partners.
Solana price is down by 1.5%, reaching $78.82, plunging below $80, and underperforming the broader…
The crypto market is entering a decisive week, with Bitcoin price holding above $67,000, Ethereum…
The crypto market is attempting to stabilise, with leading assets like Bitcoin and Ethereum holding…
Ever since its rejection from the 2025 highs above $740, the Zcash price has remained…
The SIREN price is back in the spotlight after a sharp bounce from recent lows.…
Good Friday shut down CME futures and all crypto ETF activity on April 3, removing…